Building A Vulnerable Active Directory Home Lab
A step-by-step guide to building a fully functional vulnerable Active Directory home lab using Windows Server 2025 for hands-on learning and security practice.
Requirements
To build your AD home lab, you’ll need the following:
- A computer capable of virtualization (at least 16GB RAM and 100GB+ free storage recommended)
- Virtualization software like VMware Workstation, VirtualBox, or Hyper-V
- ISO files for Windows Server and optionally Windows 10/11
- A basic understanding of networking concepts (IP addressing, DNS, etc.)
Setting Up Windows Server 2025
Begin by installing Windows Server 2025, which will serve as the Domain Controller for your Active Directory lab environment.
Open VMware and create a new virtual machine. Attach the Windows Server 2025 ISO file as the installation media, then proceed with the standard installation process.
During setup, you’ll be prompted to create a password for the built-in Administrator account. Choose a password, this account will later act as the Domain Administrator. For this example I’ll use
P@$$w0rd!After logging into Windows Server for the first time, rename the machine to a meaningful hostname. In this example, I’ll use
SCRANTON-DCOnce renamed, reboot the server to apply the changes. This ensures the new hostname is correctly registered and recognized by system services.
After rebooting, the Server Manager dashboard will open automatically. This is the central hub where you’ll add server roles and features—including Active Directory Domain Services (AD DS).
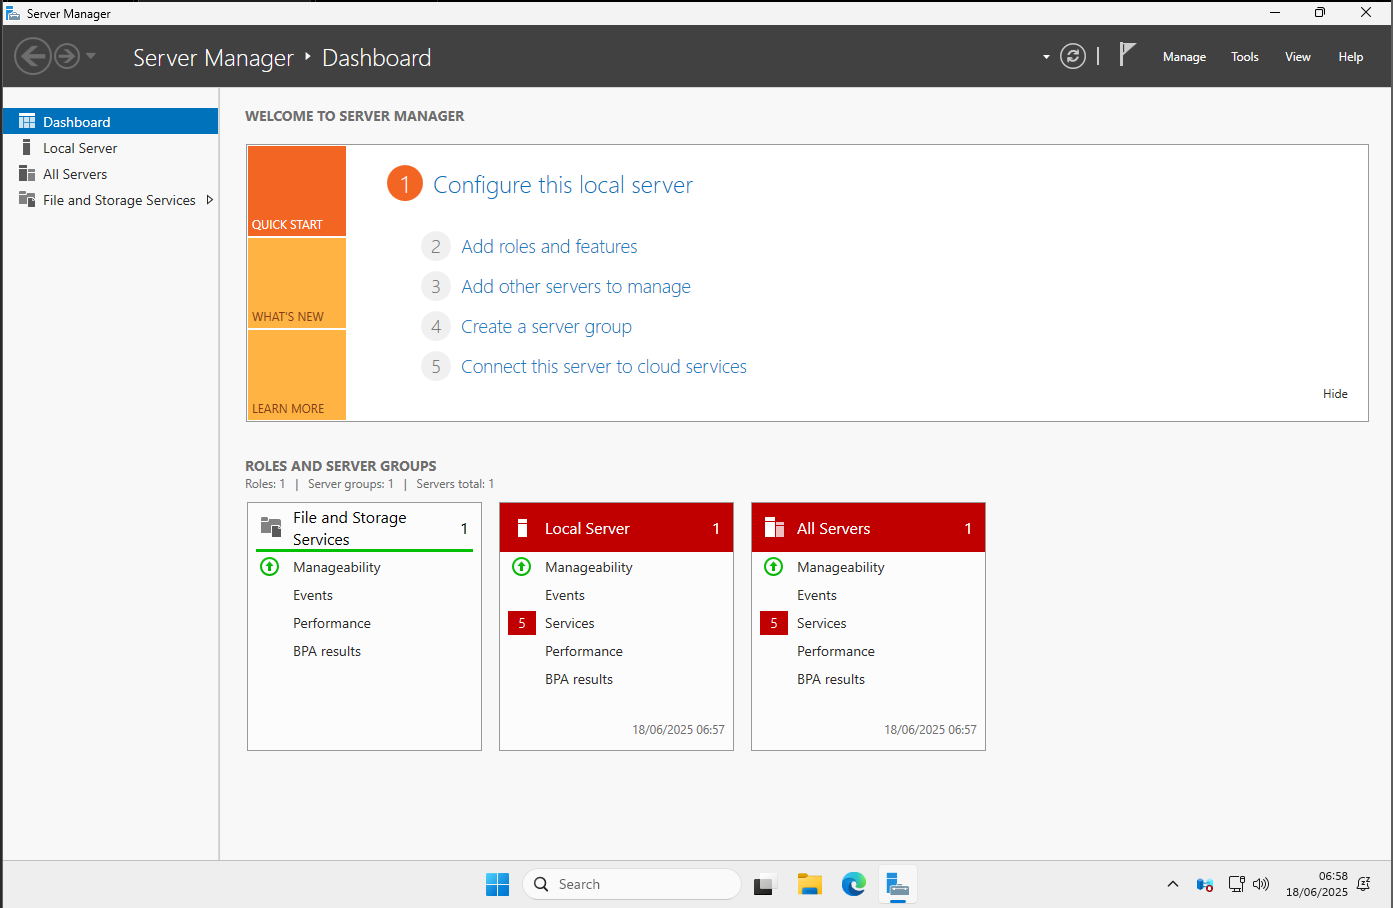
Installing Active Directory Domain Services (AD DS)
Once you’re on the Server Manager dashboard, follow these steps to install and configure Active Directory Domain Services:
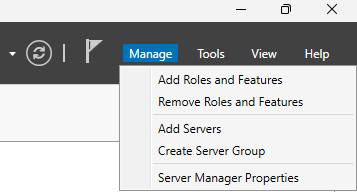
Open the Add Roles and Features Wizard. Click on the Manage tab in the top-right corner and select Add Roles and Features.
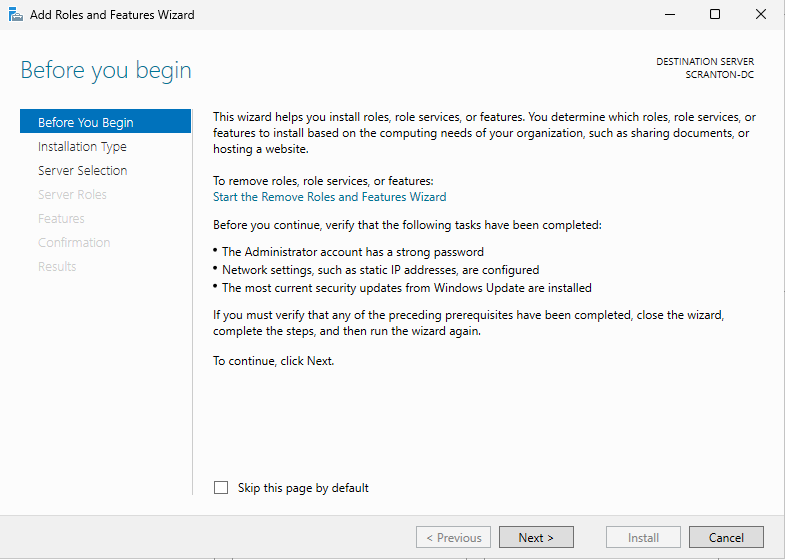
Proceed through the Add Roles and Features Wizard by clicking Next on each screen until you reach the Server Roles section.
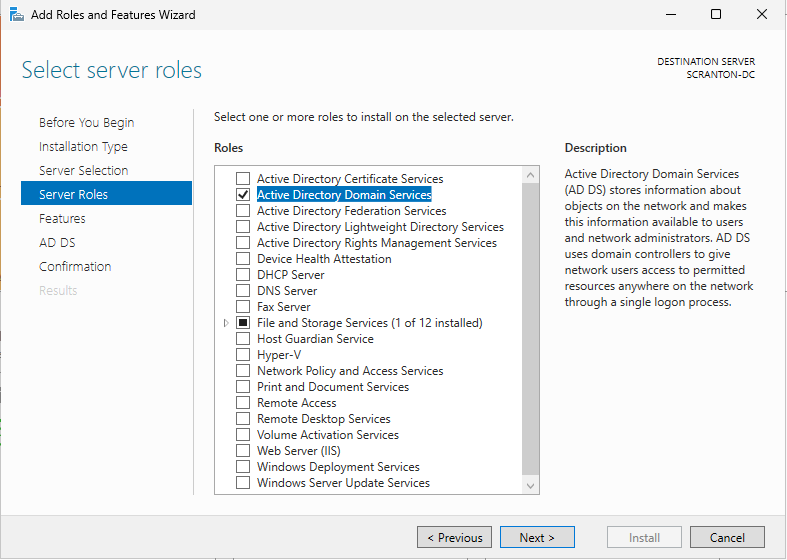
In the Server Roles list, check the box for Active Directory Domain Services. Click Next until you reach the Install screen, then begin the installation.
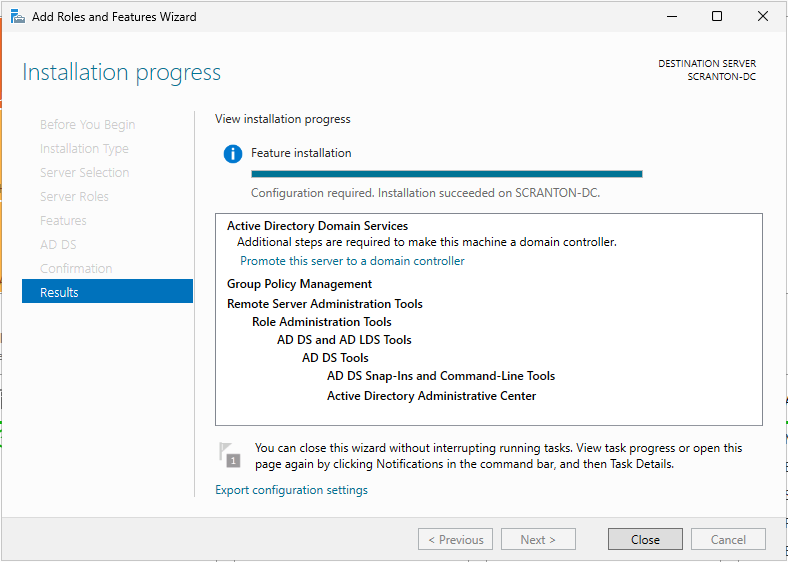
After the installation completes, you will see Promote this server to a domain under additional steps, click it.
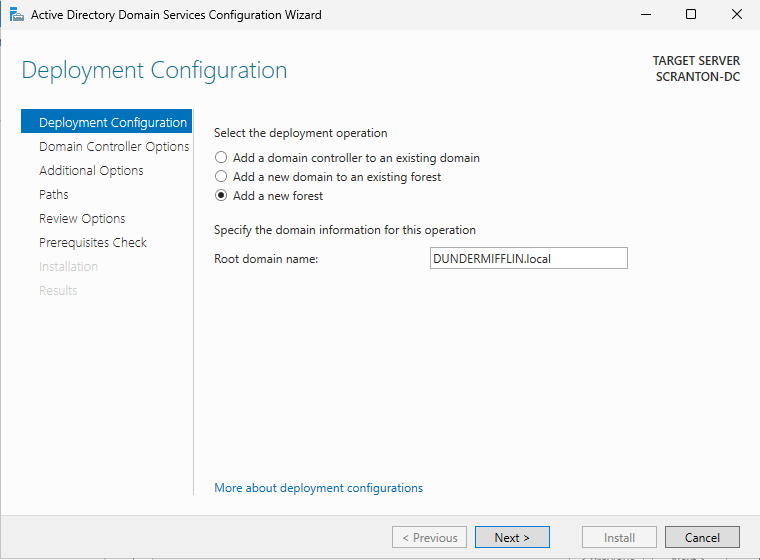
In the Deployment Configuration window select Add a new forest, Enter your desired Root domain name — for example: DUNDERMIFFLIN.local
Continue through the wizard, accepting the default settings unless you have specific configurations in mind. When you reach the final screen, click Install.
Once installation is complete, the server will automatically reboot. After restarting, the system will be a fully functioning Domain Controller. You can now log in using your domain credentials: DUNDERMIFFLIN\Administrator

Installing Active Directory Certificate Services (AD CS)
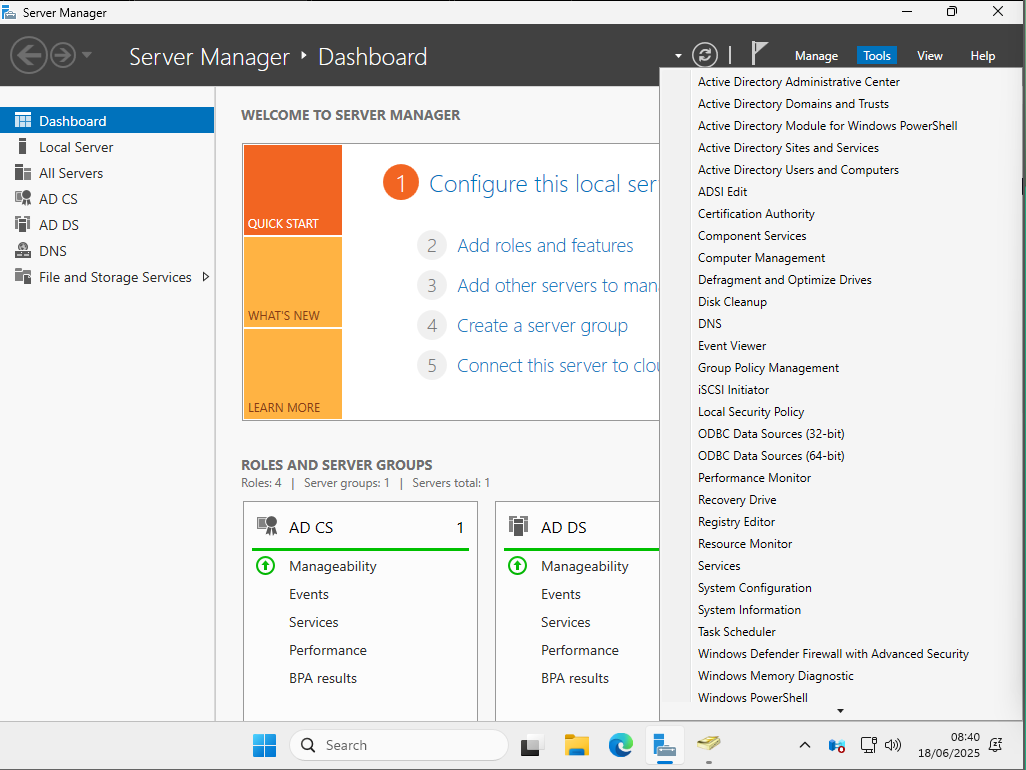
After you logged back in as the new Domain Administrator open up the Server Manager, click on the Manage tab, and select Add Roles and Features.
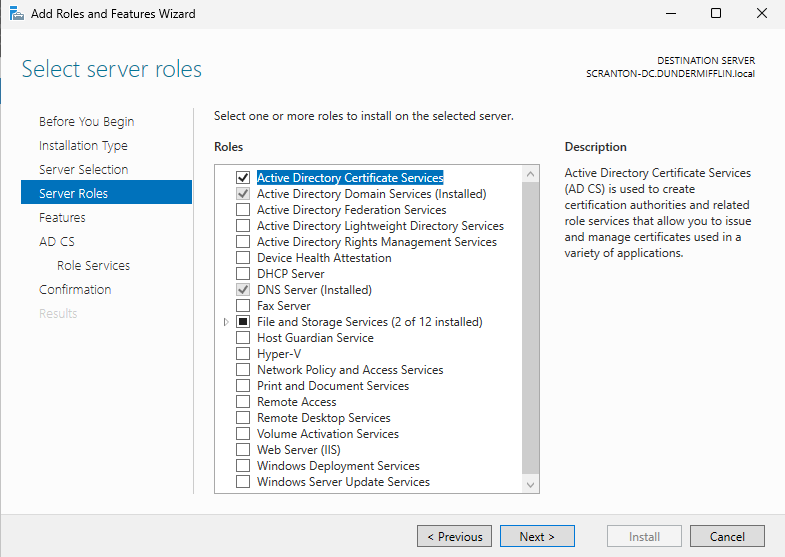
In the Server Roles section, check the box for Active Directory Certificate Services.
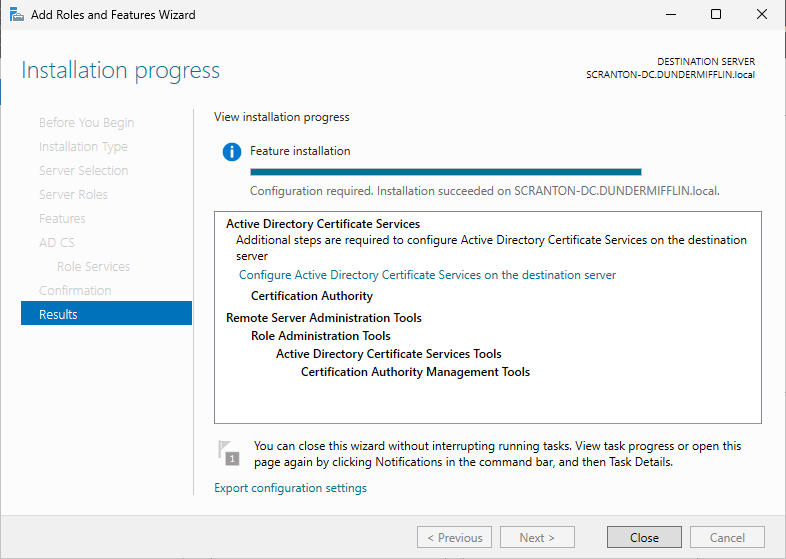
After installation completes, a new option will appear in Server Manager titled Configure Active Directory Certificate Services on the destination server. Click it to begin configuration.
In the configuration wizard, under Role Services, ensure that Certification Authority is selected. This is the core component of AD CS and is required for issuing certificates.
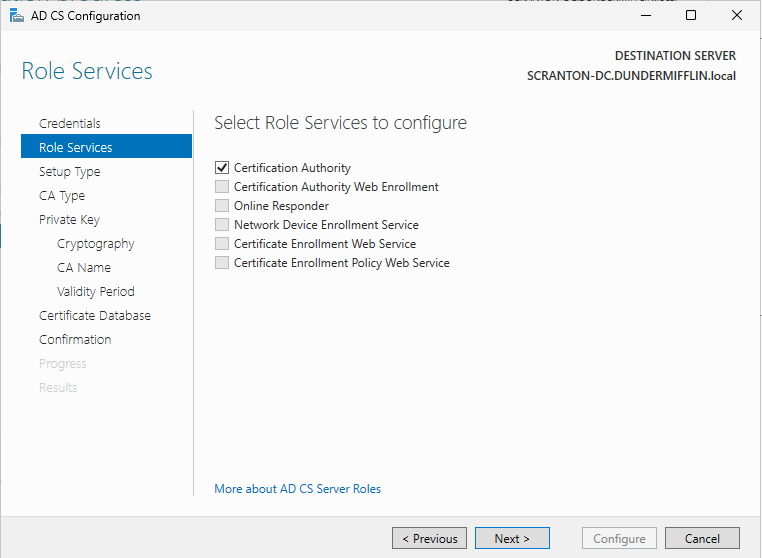
Proceed through the wizard, accepting the default settings unless you have specific requirements. Finally, click Configure to complete the setup.
Once configuration is complete, AD CS is now installed and ready to use within your domain environment.
Creating Users, Service Accounts, File Shares and Group Policies
Once Active Directory is installed and the server has been promoted to a Domain Controller, you can begin creating users and organizing them into OUs
Right-click your domain name (e.g., DUNDERMIFFLIN.local), select New > Organizational Unit, and name it Groups. This will help separate group objects from user accounts for better visibility and management. Move all group objects from the default Users container into the new Groups OU.

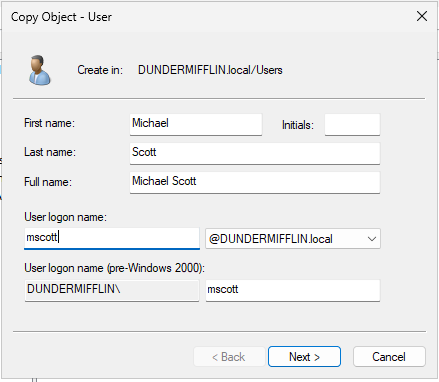
To create a new administrator account, right-click the built-in Administrator user and select Copy. When prompted, enter the following:
- First Name: Michael
- Last Name: Scott
- User Logon Name: mscott
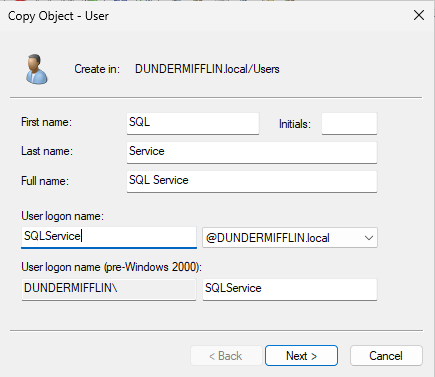
Repeat the same steps to create a service account. This time, name the account SQL Service and use SQLService as the user logon name. Assign a password and again ensure it’s set to never expire.
To create standard users, right-click within the Users container (or any OU), select New > User, then enter the user’s name, username, and password. Create as many test or low-level accounts as needed.
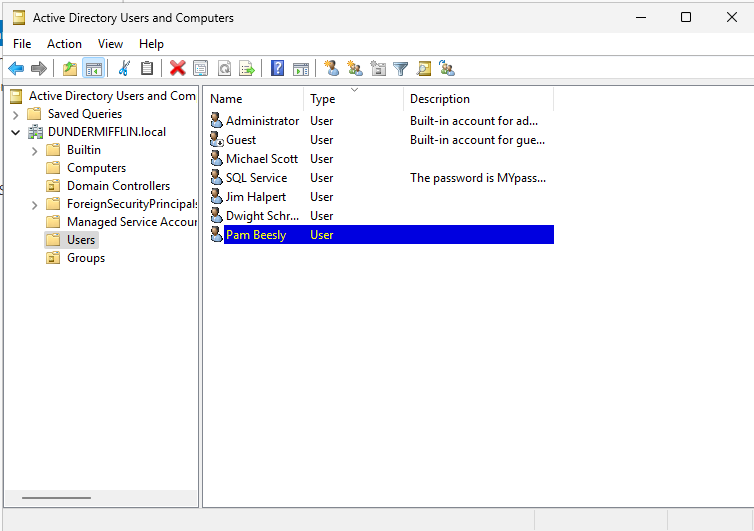
Once these steps are complete, your Active Directory environment will be populated with users, service accounts, and an organized OU structure.
Setting up a Vulnerable File Share
Return to Server Manager, then navigate to File and Storage Services, and select Shares. On the right side, click the Tasks dropdown and choose New Share.
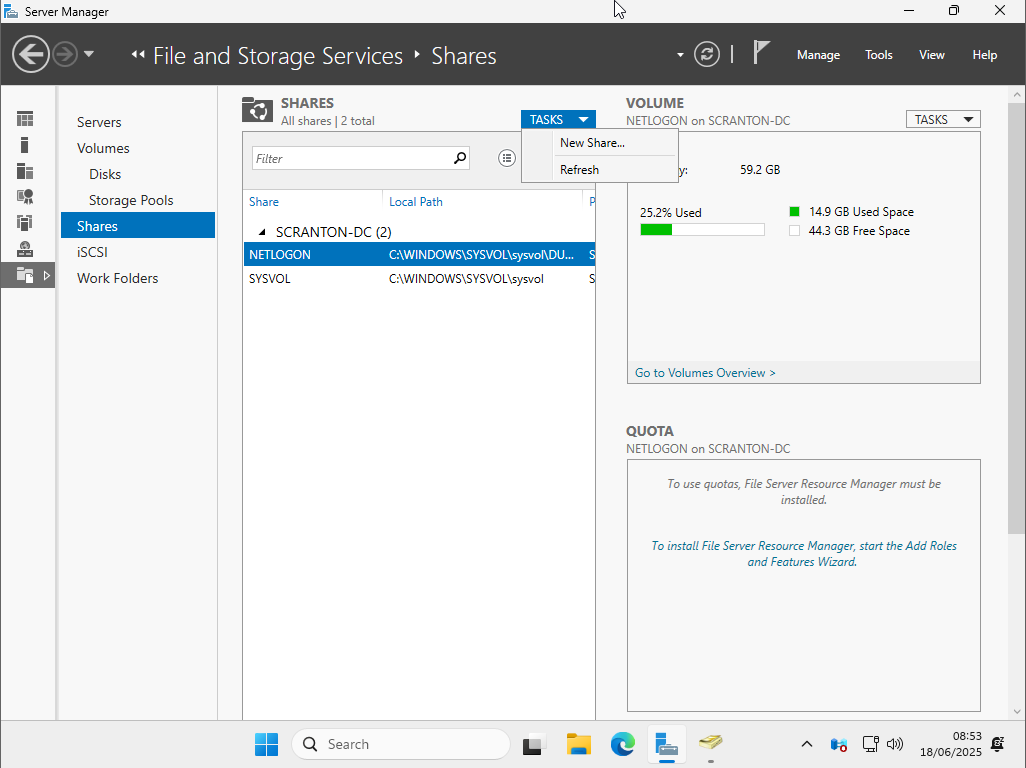
Select SMB Share - Quick and click Next through the wizard until you reach the screen to name your share. Enter a name for the share— for this example, use Employees. Continue clicking Next, then click Create to finalize the share setup.
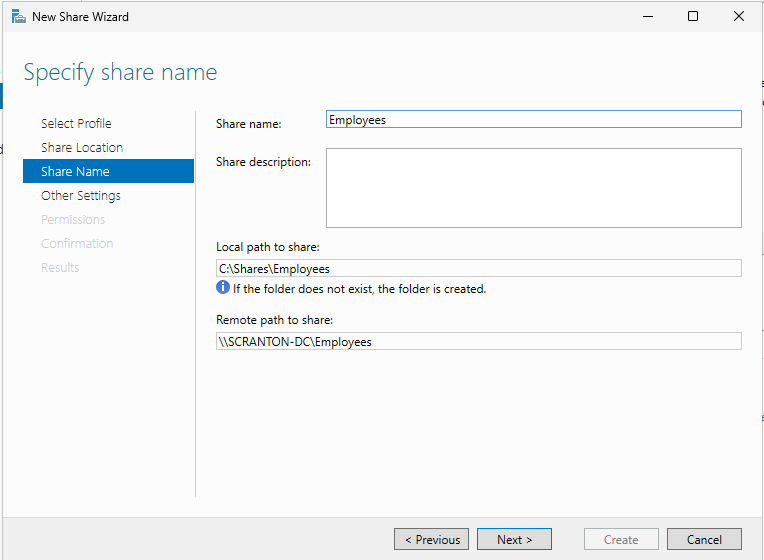
Your vulnerable file share is now created and ready to use.
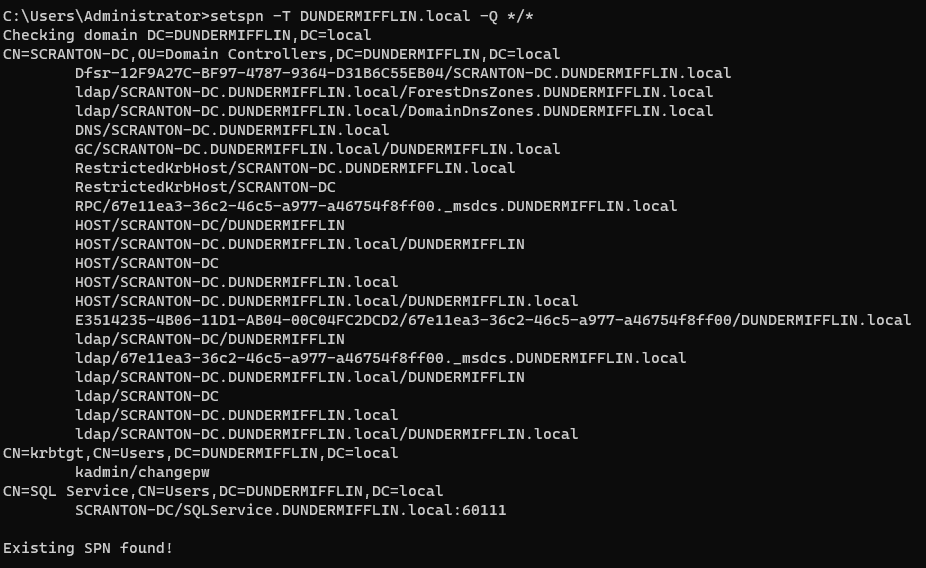
Setting up Service Account
To register a Service Principal Name (SPN) for the SQLService account, open Command Prompt as Administrator.
Use the following syntax to add the SPN. Be sure to replace the domain and DC names with your own environment’s values:
1
setspn -a SCRANTON-DC/SQLService.DUNDERMIFFLIN.local:60111 DUNDERMIFFLIN\SQLService

This command binds the SPN to the service account so it can be used for authentication (e.g., by Kerberos).
To verify that the SPN was registered successfully, run the following query:
1
setspn -T DUNDERMIFFLIN.local -Q */*
This will return a list of all registered SPNs in the domain. Look for the one you just added to confirm it’s been set correctly.
Creating Group Policy to disable Windows Defender
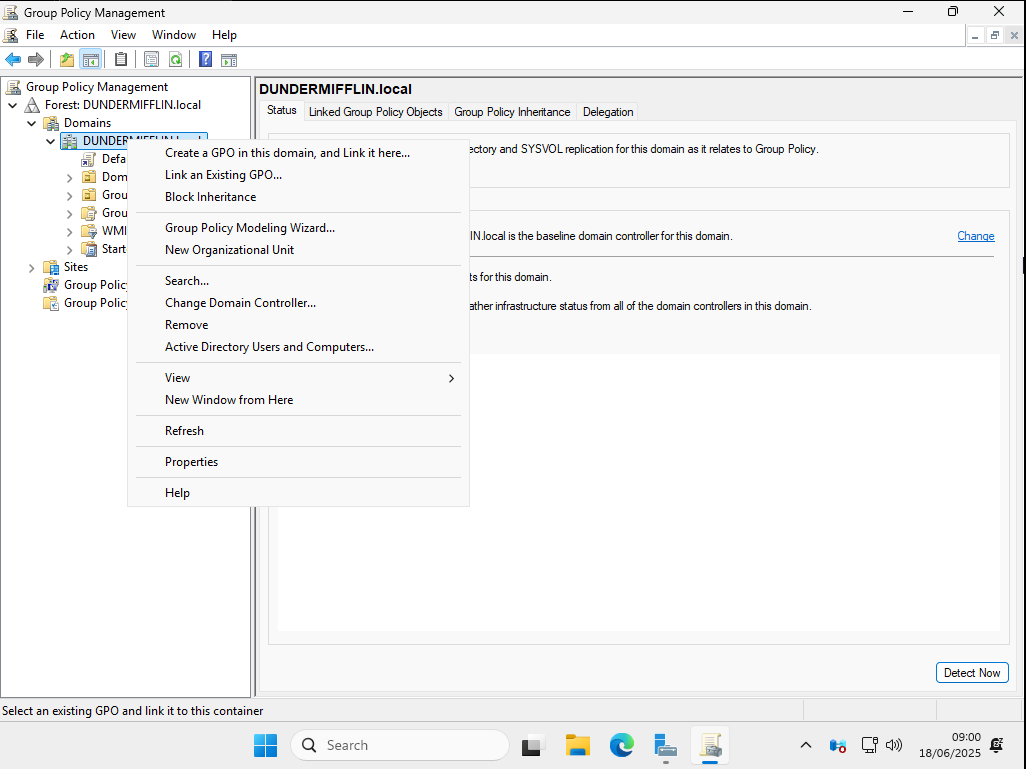
Open Group Policy Management from the Server Manager or via the Start Menu. Under Domains, locate your domain name (e.g., DUNDERMIFFLIN.local), right-click it, and select Create a GPO in this domain, and Link it here.
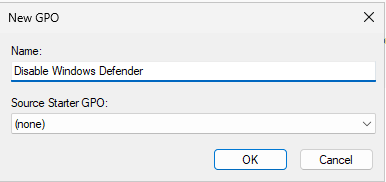
Name the new Group Policy Object Disable Windows Defender, then click OK.
Next, right-click the newly created GPO and select Edit. In the Group Policy Management Editor, navigate to:
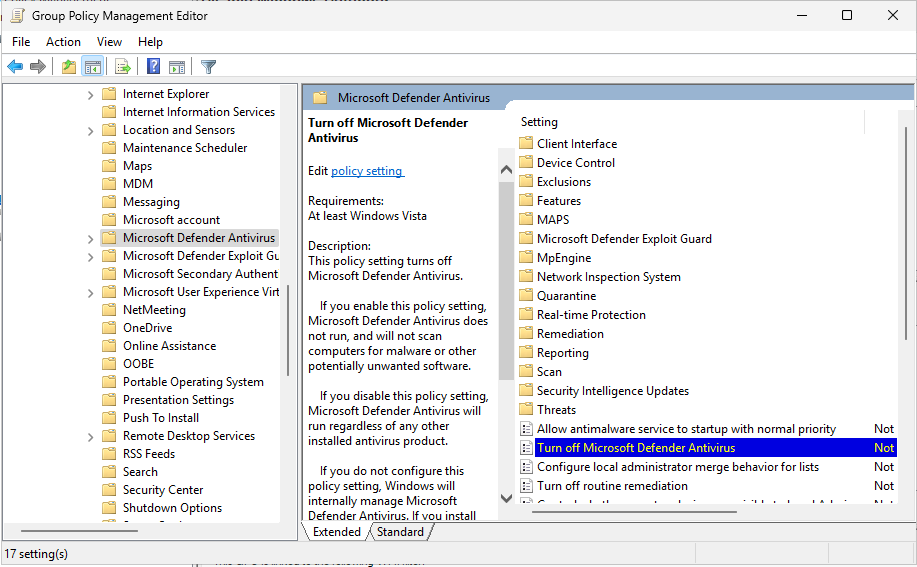
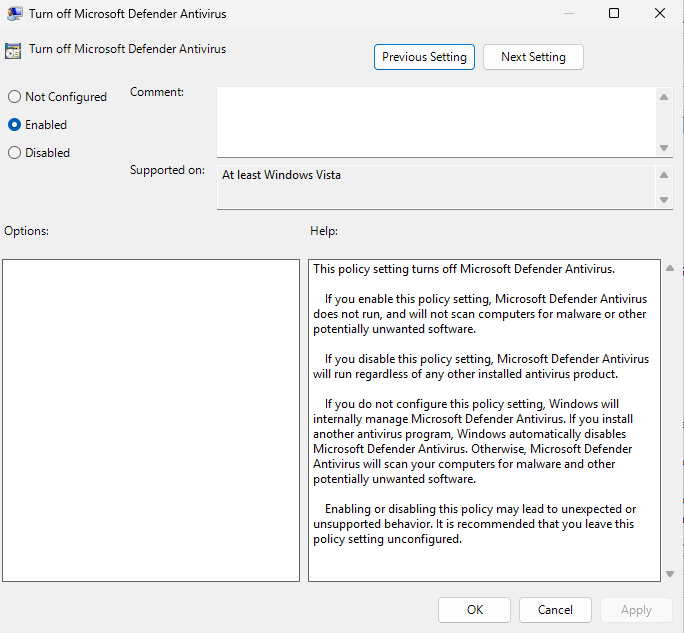
Computer Configuration → Policies → Administrative Templates → Windows Components → Microsoft Defender Antivirus Double-click on Turn off Microsoft Defender Antivirus, set it to Enabled, then click Apply and OK to save the changes.
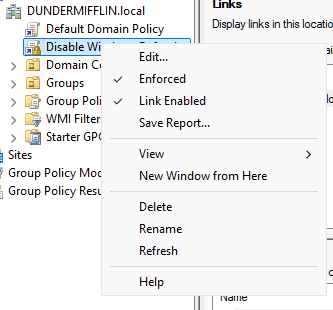
Finally, return to the main Group Policy Management window, right-click the Disable Windows Defender GPO, and select Enforce to ensure the policy is applied across the domain.
Setting up the User Machines
To simulate user workstations in the lab, you’ll be installing two Windows 11 Enterprise virtual machines. Start by downloading the official Windows 11 Enterprise ISO, then use VMware to create a new virtual machine.
Go through the standard Windows setup process. When prompted to sign in, click More options and choose Domain join instead. Create a local user account by entering a name and password—this will be used to log in before joining the domain.

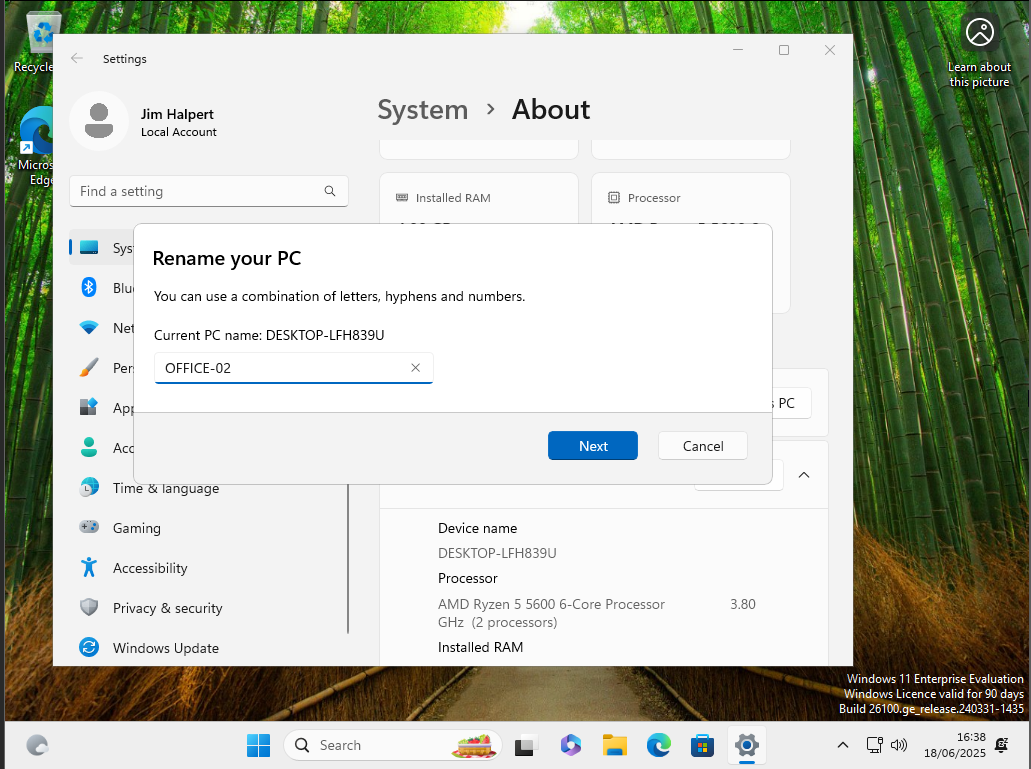
Once installation is complete, rename the machine to something identifiable. In this example, the first VM is named OFFICE-01. You’ll need a second machine as well, so repeat the process using the same ISO and name the second VM OFFICE-02.
Both of these machines will later be joined to the domain to complete the Active Directory lab setup.
Enabling Local Admin Accounts
To begin, press Win + R, type lusrmgr.msc, and press Enter to open Local Users and Groups.
In the left pane, select Users, then double-click the built-in Administrator account in the center pane. In the Administrator Properties window, uncheck Account is disabled, then click Apply and OK.
To assign a password, right-click the Administrator account and choose Set Password. Click Proceed, enter a strong password, confirm it, and click OK.
Next, to grant local admin privileges to a domain user account, click on Groups in the left pane, then double-click the Administrators group.
In the Administrators Properties window, click Add, then in the object name field, enter the domain user you want to give admin rights to (e.g., DUNDERMIFFLIN\dschrute) and click Check Names. Once resolved, click OK.
Now, the domain user has local administrative privileges on that machine, allowing for elevated access while logged in via the domain.
Joining User Machines to the Domain
Before configuring the user machines, make sure your Domain Controller is assigned a static IP address. This ensures that the clients can reliably connect to it for DNS resolution and domain services. You can set this by opening Network Connections on the Domain Controller, right-clicking the active interface, selecting Properties, then setting a static IP under Internet Protocol Version 4 (TCP/IPv4). Be sure to note the IP address—you’ll use it on the client machines.
Now, on each Windows 11 user machine, open Network Connections from the Control Panel. Right-click on the active network interface and select Properties. In the list, choose Internet Protocol Version 4 (TCP/IPv4) and click Properties.
Set the Preferred DNS server to the static IP of your Domain Controller (e.g., 192.168.186.130). This allows the machine to locate and communicate with the domain for the join process.
Next, open the Start Menu, search for Access work or school, and click “Join this device to a local Active Directory domain.” Enter your domain name (e.g., DUNDERMIFFLIN.local) when prompted.
When asked for credentials, use the Domain Administrator account. After successful authentication, the machine will be joined to the domain. Restart the computer when prompted.
After rebooting, you can now log in with domain credentials like DUNDERMIFFLIN\mscott